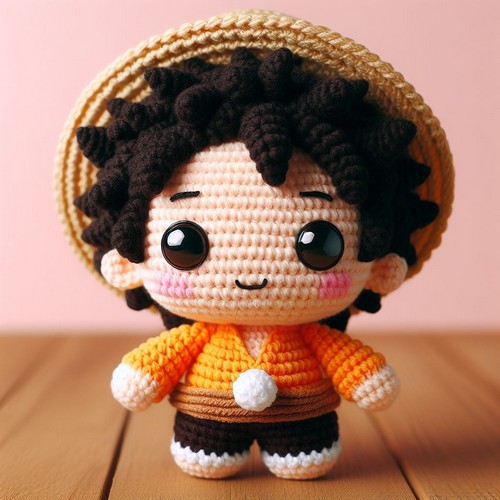
The Crochet Luffy Amigurumi Pattern lets you create a small, soft toy that looks like Luffy from the famous anime "One Piece." Using yarn and a crochet hook, you follow simple steps to shape and join pieces that makeup Luffy, including his signature hat and outfit. This pattern is perfect for show fans or those who love crafting. Following the instructions, you can make a cute, handmade Luffy, perfect for play or display.

Crochet Luffy Amigurumi Pattern
The Crochet Luffy Amigurumi Pattern creates a cute, small version of the beloved pirate Luffy from "One Piece." Using yarn and a hook, you follow detailed steps to crochet each part of Luffy's body, from his famous straw hat to his outfit. The pattern guides color changes and assembling pieces to bring Luffy to life. This enjoyable process combines basic crochet techniques, making it perfect for fans and crafters of all levels.
Making Your Crochet Luffy Amigurumi Pattern
Materials:
- Red, White, Blue, Black, and Skin-tone Yarn
- Crochet hook suitable for your yarn size
- Stuffing
- Yarn needle
- Stitch markers
Materials:
- Yarn in skin color, red, blue, yellow, and black
- Crochet hook (size appropriate for your yarn, typically around 2.5mm-3.5mm for amigurumi)
- Fiberfill for stuffing
- Yarn needle
- Safety eyes (around 8mm, or you can embroider the eyes)
Abbreviations:
- sc - single crochet
- inc - increase (2 sc in the next stitch)
- dec - decrease (sc 2 together)
- ch - chain
- sl st - slip stitch
- [ ] - repeat instructions within brackets as directed
- ( ) - total number of stitches
Head:
In skin-colored yarn
Start with a magic ring.
Round 1: 6 sc in magic ring (6)
Round 2: [inc] x6 (12)
Round 3: [sc, inc] x6 (18)
Round 4: [2 sc, inc] x6 (24)
Rounds 5-10: sc in each stitch around (24)
Insert safety eyes between Rounds 7 and 8, about 6 stitches apart.
Round 11: [2 sc, dec] x6 (18)
Start stuffing the head, continue stuffing as you work.
Round 12: [sc, dec] x6 (12)
Round 13: [dec] x6 (6)
Fasten off, leaving a tail for sewing. Finish stuffing and close the hole.
Body:
In red yarn
Start with a magic ring.
Round 1: 6 sc in magic ring (6)
Round 2: [inc] x6 (12)
Round 3: [sc, inc] x6 (18)
Round 4: Work in back loops only, sc in each stitch around (18)
Rounds 5-7: sc in each stitch around (18)
Change to blue yarn.
Rounds 8-14: sc in each stitch around (18)
Start stuffing the body; continue stuffing as you work.
Round 15: [sc, dec] x6 (12)
Fasten off, leaving a tail for sewing. Finish stuffing and close the hole. Sew the head to the body.
Hat:
In yellow yarn
Start with a magic ring.
Round 1: 6 sc in magic ring (6)
Round 2: [inc] x6 (12)
Round 3: [sc, inc] x6 (18)
Round 4: sc in the front loops only, [2 sc, inc] x6 (24)
Rounds 5-6: sc in each stitch around (24)
Sl st to the next stitch and fasten off, leaving a long tail for sewing. Attach to the head.
Legs and Arms:
Repeat similar steps as the body with modifications for length and color changes for shoes and bands. Sew them onto the body accordingly.
Finishing Touches:
Hair: Use black yarn, attach strands to the head, and style as desired.
Details: Embroider the mouth and any additional features like the scar under the eye. Add a vest by crocheting separate pieces in red yarn or painting directly onto the body.
Leave a Reply