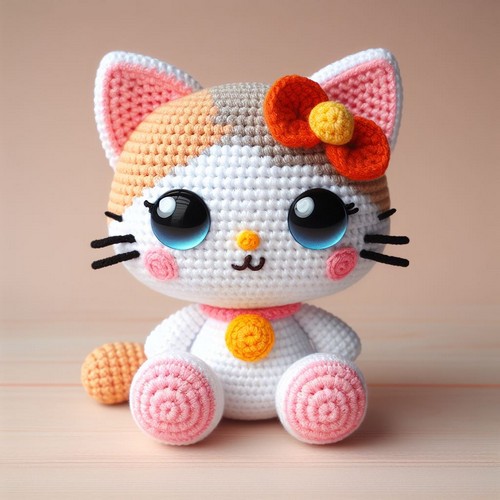
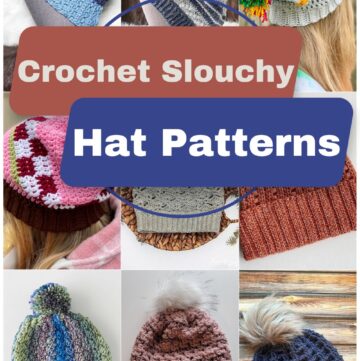
The Crochet Kitty Dunyasha Amigurumi Pattern is a delightful beginner-friendly craft guide. This pattern helps you create a lovable, feline friend with a playful character. Perfect for gifting or cozy snuggles, this soft, handmade kitty introduces a new companion to your crochet creations.
Crochet Kitty Dunyasha Amigurumi Pattern
The Crochet Kitty Dunyasha Amigurumi Pattern brings a sweet, petite kitty with expressive features and a striped costume to life. This pattern is user-friendly and ideal for anyone wanting to try crafting plush toys. Once complete, Kitty Dunyasha is a perfect little companion, a cute collectible for cat aficionados, or a comforting, soft plaything for kids.
Making Your Kitty Dunyasha Amigurumi
Materials:
- Yarn:
- Light pink yarn for the body, head, and ears
- Lighter pink yarn for the muzzle and inner ears (optional)
- White yarn for the eyes and tummy patch
- Black yarn for the eyes, nose, and mouth
- Small amount of brown yarn for the nose (optional)
- Crochet hook: Size suitable for your yarn weight
- Stuffing
- Tapestry needle
- Scissors
Step by step Pattern
Body:
- Make a magic ring with light pink yarn.
- Crochet 6 single crochets (sc) in the ring. Slip stitch to join and close the ring.
- Increase round: Chain 2 (counts as first sc), 2 sc in each sc around. Slip stitch to join. You should have 12 sc.
- Continue increasing rounds for a few rounds to create a wider base for the body, then continue crocheting rounds without increasing or decreasing until the body is almost the desired length. Stuff the body firmly as you crochet, leaving the top opening unstuffed.
Head:
- Attach light pink yarn to the top of the body with a slip stitch.
- Crochet around the top edge of the body to create the neck. You can adjust the number of stitches depending on how thick you want the neck to be.
- Continue crocheting rounds without increasing or decreasing until the head is almost the desired size. Stuff the head firmly as you crochet, leaving the top opening unstuffed.
- Shape the head by decreasing stitches as needed to create the round head and muzzle.
- Leave an opening at the bottom of the head for sewing on the ears later.
Ears (make 2):
- With light pink yarn, make a magic ring and crochet 6 sc in the ring. Slip stitch to join and close the ring.
- Increase round: Chain 2, 2 sc in each sc around. Slip stitch to join. You should have 12 sc.
- Continue increasing rounds for a few rounds to create a triangle shape.
- Continue crocheting rounds without increasing or decreasing until the ear is the desired size.
- Shape the top of the ear by decreasing stitches as needed.
- (Optional) Crochet a few rounds with the lighter pink yarn to create the inner ear.**
- Sew the ears to the head at the openings left earlier.
Muzzle:
- Switch to the lighter pink yarn (optional).
- Make a magic ring and crochet 6 sc in the ring. Slip stitch to join and close the ring.
- Increase round: Chain 2, 2 sc in each sc around. Slip stitch to join.**
- Continue increasing rounds for a few rounds or until the desired muzzle size is reached.
- Stuff the muzzle lightly and sew it to the face.
Eyes:
- Make two small magic rings with white yarn.
- Crochet 6 sc in each ring. Slip stitch to join and close the rings.
- Embroider black circles in the center of the white circles for the pupils.
- Sew the eyes to the face.
Tummy patch:
- Make a magic ring with white yarn and crochet a small circle to the desired size.
- Sew the tummy patch to the body.
Nose and mouth:
- Embroider a small triangle for the nose with black yarn or sew on a small brown yarn pom-pom (optional).
- Embroider a few small stitches for the mouth with black yarn.
Legs (make 4):
- With light pink yarn, make a magic ring and crochet 6 sc in the ring. Slip stitch to join and close the ring.
- Increase round: Chain 2, 2 sc in each sc around. Slip stitch to join. You should have 12 sc.
- Continue crocheting rounds without increasing or decreasing for a few rounds.
- Stuff the legs lightly and sew them to the bottom of the body.
Tail (optional):
- With light pink yarn, chain a desired length for the tail.
- Single crochet back down the chain to create a basic tail shape.
- Sew the tail to the back of the body.

Leave a Reply