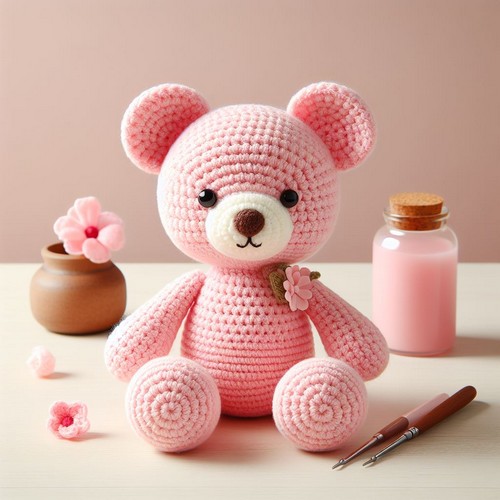
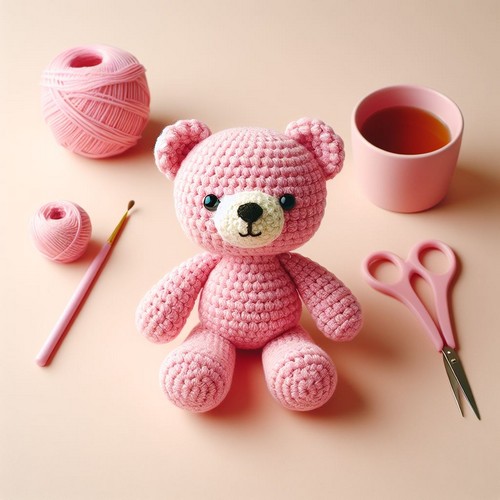
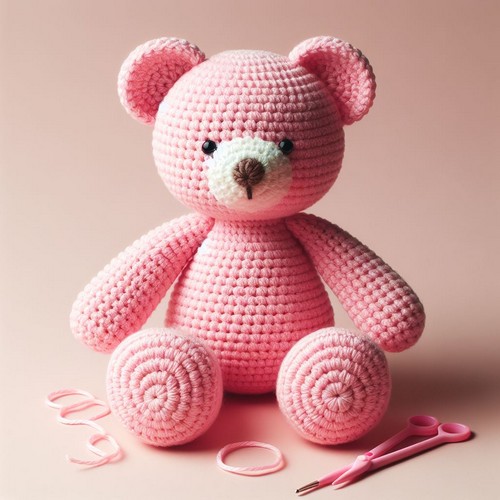
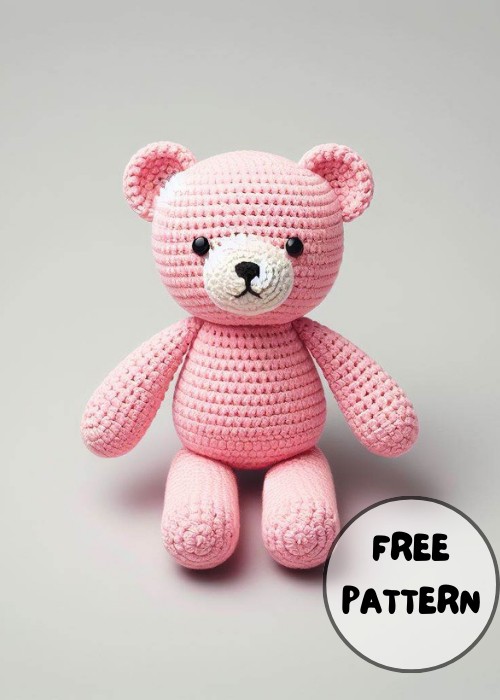
The Crochet Pink Plush Bear Amigurumi Pattern is a heartwarming project that makes crafting fun. This pattern guides you to create a soft, pink bear plushie, perfect for cuddles and gifts. Its straightforward instructions make it great for both beginners and experienced crafters looking for something cute and comforting.
Crochet Pink Plush Bear Amigurumi Pattern
The Crochet Pink Plush Bear Amigurumi Pattern creates a charming, plush teddy bear with a soft pink hue, rounded ears, and inviting eyes. The pattern is clear-cut, making it a delightful project for both beginners and seasoned crocheters. The end product results in a delightful plush bear, perfect as a heartwarming present, a decorative piece, or a cuddly playmate for children.
Crochet Pink Plush Bear Amigurumi Pattern
Materials:
- Pink yarn for the body, head, ears, and legs
- White yarn for the muzzle and inner ears (optional)
- Black yarn for the eyes, nose, and mouth
- Small amount of brown or pink yarn for the nose (optional)
- Crochet hook (size appropriate for yarn weight)
- Stuffing
- Tapestry needle
- Scissors
Step by step Pattern
Head:
- Make a magic ring with pink yarn.
- Crochet 6 single crochets (sc) in the ring. Slip stitch to join and close the ring.
- Increase round: Chain 2 (counts as first sc), 2 sc in each sc around. Slip stitch to join. You should have 12 sc.
- Continue increasing rounds until you reach the desired head size. Depending on the image you referenced, you might want to increase for a few more rounds than usual to create a wider, rounder head for the bear.
- Continue crocheting rounds without increasing or decreasing until the head is almost the desired height. Stuff the head firmly as you crochet, leaving the top opening unstuffed.
- Shape the head by decreasing stitches as needed to create the face and muzzle.
- Sew on the eyes and embroider a small nose (optional).
- (Optional) Crochet or sew on a white muzzle.
Body:
- Attach pink yarn to the base of the head with a slip stitch.
- Crochet the desired number of sc around the base of the neck to create the neck size.
- Increase a few stitches evenly around the body to create the shoulders.
- Continue crocheting rounds without increasing or decreasing for a few rounds to establish the torso.
- Separate the legs by crocheting up each leg hole a few rounds.
- Stuff the body firmly as you crochet, leaving the leg openings unstuffed.
- Shape the legs by decreasing stitches as needed.
- Leave an opening at the bottom of each leg for stuffing and sewing on the feet later.
Ears (make 2):
- With pink yarn, make a magic ring and crochet 6 sc in the ring. Slip stitch to join and close the ring.
- Increase round: Chain 2, 2 sc in each sc around. Slip stitch to join. You should have 12 sc.
- Continue increasing rounds for a few rounds to create a triangle shape.
- Continue crocheting rounds without increasing or decreasing until the ear is the desired size.
- Shape the top of the ear by decreasing stitches as needed.
- (Optional) Crochet a few rounds with white yarn to create the inner ear.**
- Sew the ears to the head.
Legs (make 4):
- With pink yarn, make a magic ring and crochet 6 sc in the ring. Slip stitch to join and close the ring.
- Increase round: Chain 2, 2 sc in each sc around. Slip stitch to join. You should have 12 sc.
- Continue crocheting rounds without increasing or decreasing for a few rounds.
- Stuff the legs lightly and sew them to the body at the leg openings.
Arms (make 2):
- Follow the same instructions for the legs, but make the arms slightly shorter.
Feet (make 4):
- With pink yarn, make a magic ring and crochet 6 sc in the ring. Slip stitch to join and close the ring.
- Increase round: Chain 2, 2 sc in each sc around. Slip stitch to join. You should have 12 sc.
- Continue crocheting rounds without increasing or decreasing for a few rounds.
- Stuff the feet lightly and sew them to the bottom of the leg openings.
Finishing touches:
- Embroider a small smile or frown on the face using black yarn.
- Add any other details you like, such as individual toes on the feet.
- Remember, this is just a general guide, and you may need to adjust the instructions based on the specific size and features you want for your amigurumi pink plush bear.
Leave a Reply