The Crochet Giraffe Amigurumi Pattern is a fun and creative guide to making a cute, stuffed giraffe toy using crochet techniques. Amigurumi is a Japanese craft that involves knitting or crocheting small, stuffed yarn creatures. This pattern walks you through each step with simple instructions to create a colorful giraffe. Perfect for crafters of all levels, it's a delightful project that combines the joy of making something by hand with the magic of bringing a whimsical animal to life.
Crochet Giraffe Amigurumi Pattern
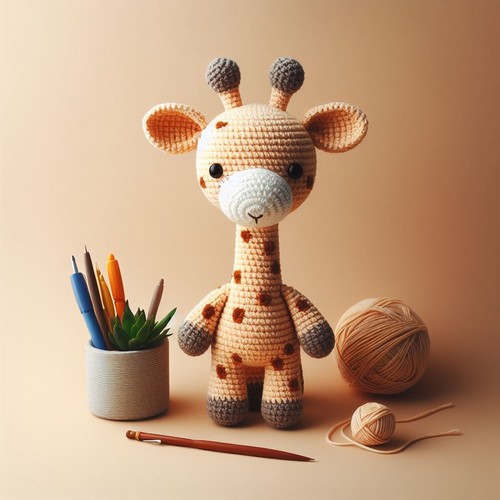
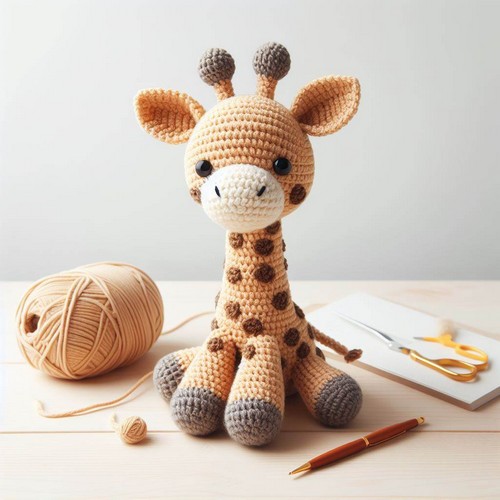
The Crochet Giraffe Amigurumi Pattern results in an adorable, plush giraffe toy characterized by a rich texture and eye-catching spots on its body. This pattern is accomplished through frequent color changes, combining single and double crochet stitches. The pattern's step-by-step guide simplifies the making process and is ideal for crochet enthusiasts seeking a unique, endearing craft project.
Making Your Crochet Giraffe Amigurumi Pattern
Materials:
- Worsted weight yarn in yellow, brown, and black
- Crochet hook (size depends on yarn weight, but the image uses a 3.5 mm hook)
- Stuffing
- Yarn needle
- Scissors
- Two black safety eyes (optional)
Step By Step Pattern
Stitches and techniques used:
- Single crochet (sc)
- Increase (inc)
- Decrease (dec)
- Magic ring (mr)
- Chain (ch)
- Slip stitch (sl st)
Instructions:
1. Body:
- Using yellow yarn, start with a magic ring and crochet 6 single crochets (sc) in the ring. Join with a slip stitch (sl st).
- Round 2: Increase in each stitch around (12 sc). Join with a sl st.
- Round 3: Increase in every other stitch around (18 sc). Join with a sl st.
- Round 4: Increase in every third stitch around (24 sc). Join with a sl st.
- Rounds 5-8: sc in each stitch around, joining each round with a sl st.
- Round 9: Increase in every fourth stitch around (30 sc). Join with a sl st.
- Rounds 10-14: sc in each stitch around, joining each round with a sl st.
- Round 15: Stuff the body firmly. Decrease in every fourth stitch around (24 sc). Join with a sl st.
- Round 16: Decrease in every third stitch around (18 sc). Join with a sl st.
- Round 17: Decrease in every other stitch around (12 sc). Join with a sl st.
- Round 18: Decrease in each stitch around (6 sc). Join with a sl st. Tie off and weave in the end.
2. Head:
- With yellow yarn, start with a magic ring and crochet 6 sc in the ring. Join with a sl st.
- Round 2: Increase in each stitch around (12 sc). Join with a sl st.
- Round 3: Increase in every other stitch around (18 sc). Join with a sl st.
- Rounds 4-5: sc in each stitch around, joining each round with a sl st.
- Round 6: Increase in every third stitch around (24 sc). Join with a sl st.
- Rounds 7-8: sc in each stitch around, joining each round with a sl st.
- Round 9: Stuff the head firmly. Decrease in every third stitch around (18 sc). Join with a sl st.
- Round 10: Decrease in every other stitch around (12 sc). Join with a sl st.
- Round 11: Decrease in each stitch around (6 sc). Join with a sl st. Tie off and weave in the end.
3. Legs (make 4):
- With yellow yarn, chain 15 stitches.
- Slip stitch into the first chain from the hook to form a ring.
- Round 1: sc in each stitch around (15 sc). Join with a sl st.
- Rounds 2-5: sc in each stitch around, joining each round with a sl st.
- Stuff the leg lightly.
- Round 6: Decrease in each stitch around (10 sc). Join with a sl st. Tie off and weave in the end.
- Repeat to make 3 more legs.
4. Attaching the legs:
- Sew the legs to the bottom of the body, evenly spaced around the body.
5. Neck:
- With yellow yarn, chain 18 stitches.
- Turn, sc in each stitch back to the starting chain, ch 1, turn (17 sc).
- Round 2-8: sc in each stitch around, joining each round with a sl st.
- Stuff the neck lightly.
- Round 9: Decrease in each stitch around (12 sc). Join with a sl st.
- Round 10: Decrease in each stitch around (6 sc). Join with a sl st. Tie off and weave in the end.
6. Attaching the neck:
- Sew the neck to the body's top and the head's bottom.
7. Ears (make 2):
- With brown yarn, chain 5 stitches.
- Slip stitch into the first chain from the hook to form a ring.
- Round 1: sc in each stitch around (5 sc). Join with a sl st.
- Round 2: Increase in each stitch around (10 sc). Join with a sl st.
- Round 3: sc in each stitch around (10 sc). Join with a sl st.
- Round 4: Decrease in every other stitch around (5 sc). Join with a sl st. Tie off and weave in the end.
- Fold the ear in half lengthwise and sew the sides together, leaving the bottom open. Stuff the ear lightly and sew the bottom closed.
8. Attaching the ears:
- Sew the ears to the top of the head, on either side.
9. Horns (make 2):
- With brown yarn, chain 5 stitches.
- Slip stitch into the first chain from the hook to form a ring.
- Round 1: sc in each stitch around (5 sc). Join with a sl st.
- Rounds 2-3: sc in each stitch around, joining each round with a sl st.
- Round 4: Increase in each stitch around (10 sc). Join with a sl st.
- Round 5-6: sc in each stitch around, joining each round with a sl st.
- Round 7: Decrease in every other stitch around (5 sc). Join with a sl st. Tie off and weave in the end.
- Roll up the chain to form a cone shape and sew the edges together.
10. Attaching the horns:
- Sew the horns to the top of the head on either side.
11. Eyes (optional):
- Sew on the two black safety eyes to the head.
12. Spots (optional):
- Crochet small circles or ovals using brown yarn and sew them onto the body in a random pattern.
13. Finishing touches:
- Once you've added all the desired details, your cute crochet giraffe amigurumi is complete!
Tips:
- Use stitch markers to track rounds and identify where to sew on body parts.
- You can adjust the size of the giraffe by using a different yarn weight or crochet hook size.
- Feel free to experiment with different colors and patterns for the spots or other details!


Leave a Reply