The Crochet Luisa Doll Amigurumi Pattern is an engaging guide to creating a cute, detailed doll. Perfect for crafters looking to make a special toy, it breaks down each part with clarity, resulting in a personalized, huggable doll ideal as a heartfelt gift.
Crochet Luisa Doll Amigurumi Pattern
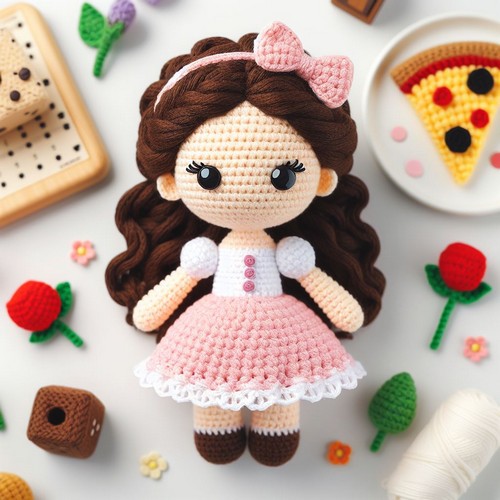
The Crochet Luisa Doll Amigurumi Pattern guides you through creating a charming and whimsical doll named Luisa, distinguished by her stylish outfit and sweet smile. This amigurumi pattern provides step-by-step instructions for crafting Luisa's friendly face, flowing hair, and removable clothing, making it not just a fun project but also a lovable toy for kids or a quaint collectible for adults.
Making Your Crochet Luisa Doll Amigurumi
Materials:
- Yarn in your chosen colors for the skin, hair, dress, and shoes.
- A 3.0 mm crochet hook (adjust the size based on your yarn).
- Fiberfill for stuffing.
- Safety eyes (about 6-8 mm, depending on preference).
- Embroidery thread for facial features.
- Yarn needle.
- Scissors.
Key Abbreviations (US Terms):
- ch: chain
- sc: single crochet
- inc: increase (2 sc in one stitch)
- dec: decrease (sc two together)
- sl st: slip stitch
- BLO: back loop only
Step by step Pattern
Head (skin color):
Start with a magic circle with 6 sc. (6)
Inc in each st around. (12)
Sc in the next st, inc; repeat around. (18)
Sc in the next 2 sts, inc; repeat around. (24)
Sc in the next 3 sts, inc; repeat around. (30)
Sc in the next 4 sts, inc; repeat around. (36)
Sc in the next 5 sts, inc; repeat around. (42)
8-14. Sc around (42)
Sc in the next 5 sts, dec; repeat around. (36)
Sc in the next 4 sts, dec; repeat around. (30)
Sc in the next 3 sts, dec; repeat around. (24)
Insert safety eyes between rows 12 and 13, about 6 stitches apart.
Start stuffing the head, continue to stuff as you work.
Sc in the next 2 sts, dec; repeat around. (18)
Sc in the next st, dec; repeat around. (12)
Dec around. (6)
Fasten off, leaving a long tail for sewing. Finish stuffing the head firmly.
Body (dress color):
Start with a magic circle with 6 sc. (6)
Inc in each st around. (12)
Sc in the next st, inc; repeat around. (18)
Sc in the next 2 sts, inc; repeat around. (24)
5-10. Sc around. (24)
Sc in the next 2 sts, dec; repeat around. (18)
12-14. Sc around. (18)
Start stuffing the body, continue to stuff as you work.
Sc in the next st, dec; repeat around. (12)
Dec around. (6)
Fasten off, leaving a tail for sewing the body to the head.
Arms (make 2, skin color for hands and dress color for sleeves):
Start with a magic circle with 6 sc in the skin color. (6)
2-4. Sc around. (6)
Switch to the dress color yarn.
5-8. Sc around. (6)
Fasten off, leaving a long tail for sewing. Slightly stuff the lower part.
Legs and Shoes (make 2, shoe color):
Start with the shoe color, magic circle with 6 sc. (6)
Inc in each st around. (12)
Sc in the next st, inc; repeat around in BLO. (18)
4-5. Sc around. (18)
Switch to the leg (pant or skin) color.
6-10. Sc around. (18)
Fasten off the first leg. For the second leg, do not fasten off; instead, continue with the body instructions to join the legs and continue the body in one piece.
Assembly:
Sew the head to the body.
Attach the arms evenly on each side of the body.
Sew on the legs.
Add any additional features such as hair, clothes, or accessories as desired.
Hair and Facial Features:
Embroider the eyes if you’re not using safety eyes, mouth, and any other desired facial features.
For the hair, either sew yarn directly onto the head for a flat look or crochet a hair cap and attach strands of yarn for a fuller look.
Finishing Touches:
Use embroidery floss for the nose and any additional facial details.
Crochet or create felt clothing and accessories as desired.
Leave a Reply