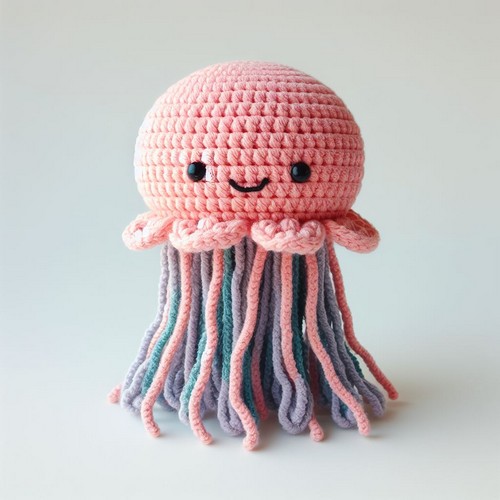
The Crochet Jellyfish Amigurumi Pattern is a fun way to make your cute jellyfish toy with yarn and a crochet hook. This pattern guides you step by step, teaching you how to create the jellyfish's round body and wavy tentacles. It's great for beginners and advanced crocheters, offering a chance to practice various stitches and techniques. By following this pattern, you can make a soft, adorable jellyfish that can be a perfect gift or a charming addition to your collection of handmade items.
Crochet Jellyfish Amigurumi
The Crochet Jellyfish Amigurumi Pattern brings to life a playful sea creature with its spiraling tentacles and plush body. Using yarn and a crochet hook, crafters follow simple steps to loop and stitch, creating a toy and a piece of handmade joy. This pattern is perfect for beginners, guiding them through each part of the jellyfish, from top to bottom, ensuring a cute and friendly aquatic friend.
Making Your Crochet Jellyfish Amigurumi
Materials:
- Worsted weight yarn in white, blue, and any other colors you want for the tentacles
- Crochet hook (size H/8 or 5.00 mm, or a size appropriate for your yarn)
- Stuffing
- Scissors
- Yarn needle
- Two black safety eyes (optional)
Step By Step Pattern
Stitches and techniques:
- Single crochet (sc)
- Increase (inc)
- Magic ring (mr)
- Chain (ch)
- Slip stitch (sl st)
Instructions:
1. Body:
- Using white yarn, start with a magic ring and crochet 6 sc in the ring. Join with a slip stitch (sl st).
- Round 2: Increase in each stitch around (12 sc). Join with a sl st.
- Round 3: Increase in every other stitch around (18 sc). Join with a sl st.
- Round 4: Increase in every third stitch around (24 sc). Join with a sl st.
- Rounds 5-8: Sc in each stitch around, joining each round with a sl st.
- Round 9: Decrease in every third stitch around (18 sc). Join with a sl st.
- Round 10: Decrease in every other stitch around (12 sc). Join with a sl st.
- Round 11: Stuff the body firmly. Decrease in each stitch around (6 sc). Join with a sl st. Tie off and weave in the end.
2. Bell (optional):
- With blue yarn, chain 3 stitches.
- Slip stitch into the first chain from the hook to form a ring.
- Round 1: sc in each stitch around (3 sc). Join with a sl st.
- Round 2: Increase in each stitch around (6 sc). Join with a sl st.
- Round 3: Increase in every other stitch around (9 sc). Join with a sl st.
- Round 4: sc in each stitch around (9 sc). Join with a sl st.
- Round 5: Decrease in every other stitch around (6 sc). Join with a sl st.
- Round 6: Decrease in each stitch around (3 sc). Join with a sl st. Tie off and weave in the end.
- Sew the bell to the bottom of the body.
3. Tentacles (make 8):
- Choose any colors you want for the tentacles.
- Chain 20 stitches with your chosen color.
- Turn, sc in each stitch back to the starting chain, ch 2, turn (19 sc).
- Repeat the previous row until the tentacle reaches your desired length.
- Tie off and weave in the end.
- Repeat to make 7 more tentacles.
4. Attach the tentacles:
- Evenly, space the tentacles around the bottom of the jellyfish's body and sew them in place.
5. Eyes (optional):
- Sew on two black safety eyes or embroider eyes using black embroidery thread.
Customization:
- Using pink embroidery thread, you can add a blush to the jellyfish's body.
- You can change the size of the jellyfish by using a different yarn weight or crochet hook size.
- You can experiment with different colors and patterns for the tentacles.


Leave a Reply