The Crochet Bunny in Dress Amigurumi Pattern is a fun guide to help you make a cute, dressed-up bunny toy. It shows step-by-step instructions on how to use yarn and a crochet hook to create a soft rabbit wearing a pretty dress, perfect for kids or as a lovely gift.
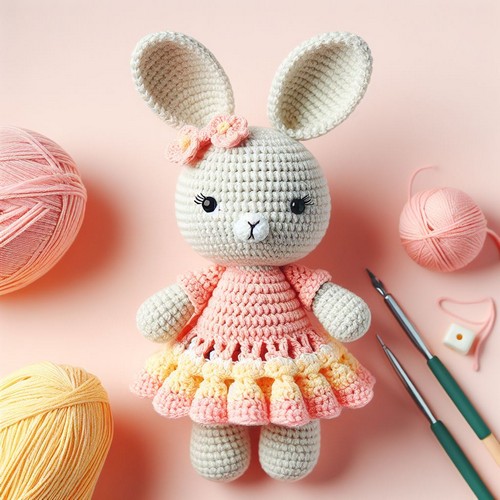
Crochet Bunny in Dress Amigurumi Pattern
The Crochet Bunny in Dress Amigurumi Pattern is a sweet guide for crafting a charming stuffed bunny, complete with a quaint little dress. It's designed with simplicity in mind, making it accessible for crocheters of all skill levels. Ideal for a heartfelt gift or as a cute decor piece, this pattern results in a delightful, cuddly companion adorned in attire that can be customized with your choice of colors, perfect for anyone who loves whimsical handmade toys.
Making Your Crochet Bunny in Dress Amigurumi
Materials:
- Worsted weight yarn in two colors (one for the body and one for the dress)
- Crochet hook size appropriate for your yarn weight (typically a size D/3 or E/4)
- Fiberfill stuffing
- Safety eyes
- Tapestry needle
- Scissors
Step by step Pattern
Body:
- Start with the body color yarn.
- Make a magic ring or chain 6 and slip stitch to join, forming a ring.
- Work two rounds of single crochets (sc) in the ring, increasing at the beginning of each round. (e.g., 6 sc in first round, 12 sc in second round)
- Continue working rounds of sc, increasing one stitch at evenly spaced intervals around the circle in each round until the body reaches the desired size. The number of increases and rounds will depend on how big you want your bunny to be. A good rule of thumb is to stop increasing when the body is about the same width as the desired head size.
- Once you have reached the desired size, stop increasing and continue working rounds of sc without increasing until the piece is about ¾ of the way desired length.
- Stuff the body firmly with fiberfill.
- To shape the head, begin decreasing one stitch at evenly spaced intervals around the circle in each round. You can decrease by crocheting two sc together.
- Continue decreasing until there are only a few stitches left.
- Stuff the head firmly with fiberfill.
- Close the opening by pulling the remaining stitches together and fastening off. Weave in the end securely.
Ears:
- With the body color yarn, chain 4.
- Single crochet (sc) in the second chain from the hook, then sc in each remaining chain. Turn your work.
- Sc in each stitch across the row. Turn your work.
- Continue working rows of sc, increasing one stitch at the beginning of each row until the ear reaches the desired size.
- Once you have reached the desired size, crochet one row of sc without increasing.
- Decrease one stitch at the beginning of each row until there are only a few stitches left.
- Stuff the ear lightly with fiberfill.
- Close the opening by pulling the remaining stitches together and fastening off. Weave in the end securely.
- Repeat steps 1-8 to make the second ear.
- Sew the ears to the top of the head.
Dress:
- With the dress color yarn, chain a number of stitches slightly more than the circumference of the bunny's body.
- Work one row of sc in each stitch back and forth.
- Continue working rows of sc until the dress reaches the desired length.
- Fold the top of the dress down to create a neckline. You can sew the folded section in place if desired.
- Sew the dress around the body of the bunny, just below the head.
Finishing Touches:
- Sew on the safety eyes.
- Embroider a nose and mouth with embroidery floss.
- You can add other embellishments to your bunny, such as a flower on the dress or a bow tie around the neck.
Tips:
- You can adjust the size of the bunny by using different yarn weights and crochet hook sizes.
- Be sure to stuff the body and head firmly so that the bunny keeps its shape.
- You can use any colors of yarn you like for the body and dress.
- If you are a beginner crocheter, you may want to start with a simpler amigurumi pattern before attempting this one.
Leave a Reply