Craft a cute and fun Crochet Amigurumi Rubber Duck with a chubby body, tiny wings, and a sweet beak. Perfect as a baby toy or handmade gift!
Crochet Amigurumi Rubber Duck Pattern
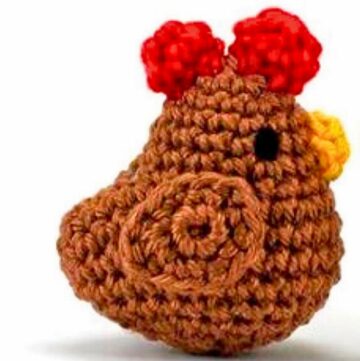
This crochet rubber duck is the perfect mix of cute and fun! The Crochet Amigurumi Rubber Duck Pattern gives you a round, chubby body, tiny wings, and a sweet little beak, giving it an adorable charm. Soft, squishy, and lightweight, it’s great as a baby toy, a playful decoration, or a thoughtful handmade gift. The simple design makes it easy to crochet, and you can personalize it with different colors. A quick, enjoyable project for anyone who loves amigurumi!

Crochet Amigurumi Rubber Duck Pattern
Materials Needed:
- Fluffy yellow chenille yarn
- Orange yarn for the beak
- Scissors
- 5 mm crochet hook
- Yarn needle
- 12 mm safety plastic eyes
- Toy stuffing
Abbreviations:
- sc: single crochet
- inc: increase (2 single crochet in the same stitch)
- dec: decrease (single crochet two stitches together)
Head:
- Round 1: Start with a magic ring. Work 6 sc into the ring. Tighten the loop.
- Round 2: Inc in each stitch around (12 sc).

- Round 3: sc, inc; repeat 6 times (18 sc).
- Round 4-6: sc in each stitch (18 sc per round).
- Place eyes between rounds 4 and 5, with 3 stitches in between.
- Round 7: sc, dec; repeat 6 times (12 sc).
- Round 8: Dec around (6 sc). Stuff the head firmly and leave a long tail to sew to the body.

Body:
- Round 1: Start with a magic ring. Work 6 sc into the ring.
- Round 2: Inc in each stitch around (12 sc).
- Round 3: sc, inc; repeat 6 times (18 sc).
- Round 4: 2 sc, inc; repeat 6 times (24 sc).
- Round 5-6: sc in each stitch (24 sc per round).
- Round 7: 2 sc, dec; repeat 6 times (18 sc).
- Round 8: sc in each stitch (18 sc).
- Round 9: 4 sc, dec; repeat 3 times (15 sc).
- Round 10-11: sc in each stitch (15 sc per round).
- Stuff the body.
- Round 12: 3 sc, dec; repeat 3 times (12 sc).
- Round 13: sc in each stitch (12 sc).
- Round 14: Dec around (6 sc). Stuff the body firmly, close the hole, and weave in the yarn end.

Wings (Make 2):
- Round 1: Start with a magic ring. Work 6 sc into the ring.
- Round 2: Inc in each stitch around (12 sc).
- Round 3-4: sc in each stitch (12 sc per round).
- Round 5: 2 sc, dec; repeat 3 times (9 sc).
- Round 6: sc in each stitch (9 sc).
- Round 7: sc, dec; repeat 3 times (6 sc). Leave a long tail to sew to the body. No stuffing needed for wings.
Beak:
- Chain 6.
- Starting from the second chain from the hook, work 5 sc across.
- Turn. Work another 5 sc on the opposite side of the chain for a total of 10 sc around.
- Slip stitch and fasten off, leaving a long tail for sewing.

Assembly:
- Attach Head to Body: Sew the head onto the body between rounds 5 and 6.
- Attach Beak: Position the beak directly below the eyes and sew securely.
- Attach Wings: Sew the wings to the body, starting from the back and placing them between rounds 5 and 11. Ensure wings are evenly spaced with 2 stitches between the head and wing.
It's important to adjust placement and firmness as needed to achieve desired results. Enjoy your crocheting!


Leave a Reply