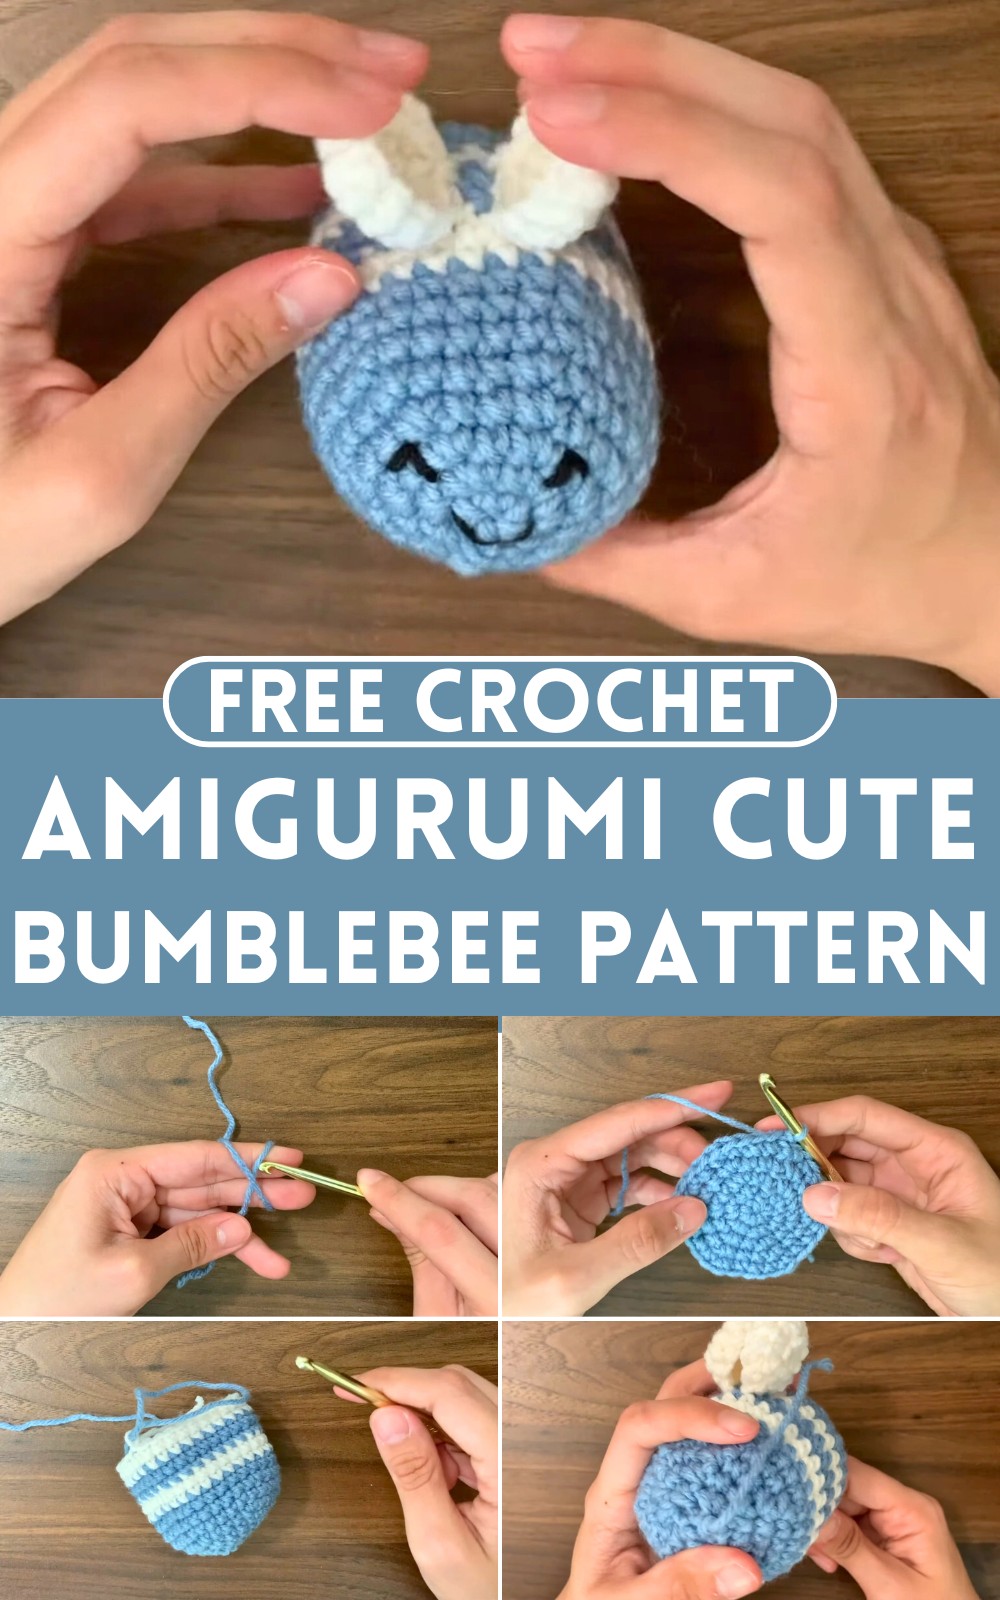
Creating a Crochet Amigurumi Bumblebee is a fun way to spend your time and add a little brightness to your day. With just a few simple stitches, you can transform yarn in bright yellows and deep blacks into an adorable, fluffy bumblebee. This little project is not just enjoyable to make but also brings a smile to anyone who sees it.
Crochet Amigurumi Bumblebee Pattern
Whether you're making it for yourself, a friend, or a little one, this bumblebee is sure to spread happiness wherever it goes. Easy to follow and satisfying to complete, this crochet craft is perfect for anyone looking to add a bit of sweetness to their crafting adventures.
Materials
- Yarn: Medium-weight yarn in three colors (yellow, black, and white).
- Crochet hook: Size 3.5 mm or 4 mm.
- Scissors
- Tapestry needle
- Stuffing (polyfill)
- Safety eyes (optional)
Body
Starting the Body
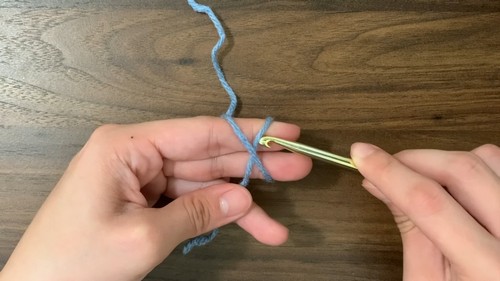
Magic Circle: Make a magic circle.
- Round 1: Chain one, then do six single crochets into the circle. Pull the tail end to close up the hole, then slip stitch into the first single crochet.
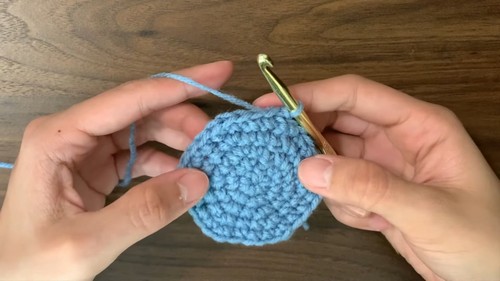
- Round 2: Chain one to start the next round. Perform an increase in each stitch around by doing two single crochets into each stitch (12 stitches total).
- Round 3: Increase every other stitch to have 18 stitches at the end.
- Round 4: Increase every third stitch to reach 24 stitches.
- Round 5: Increase every fourth stitch for a total of 30 stitches.
- Round 6: Perform one single crochet into every stitch around with no increases.
Building the Body
- Continue with rounds of no increases until you reach the desired size for your bumblebee's body (suggestion: three rounds).
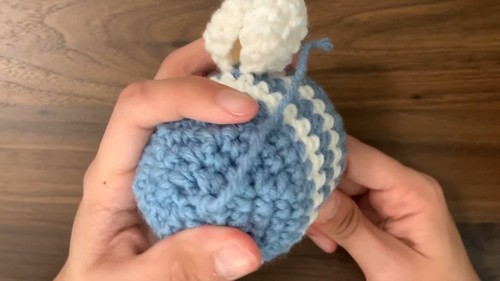
Adding Stripes
- After the desired number of rounds for the body, switch to a different color yarn and make two rounds with no increases.
- Switch back to the original color yarn and make two more rounds with no increases.
- Secure the yarn by slip stitching and cutting off the yarn, then tie the end.

Wings
- Making the Wings: Make two magic circles and follow the same pattern as for the body, stopping after three rounds.
- Attaching the Wings: Attach the wings to the bumblebee's body between the stripes, ensuring the slip stitches face downwards.
Face
- Mouth and Eyes: Use a yarn needle to thread black yarn through and create the mouth and eyes. For the mouth, pull the yarn through the center of the wings down to the outside of the first round. Create two upside-down 'V's for the eyes.
Stuffing
- Fill the bumblebee with polyfill to your desired firmness.
Closing the Bumblebee
Decreasing: Start decreasing to form the back end of the bumblebee by following a pattern of decreases in each round.
- Round 17: Decrease every fourth stitch.
- Round 18: Decrease every third stitch.
- Round 19: Decrease every second stitch.
- Round 20: Decrease every stitch.
Fastening Off: After the final round, chain one and cut a strand of yarn. Sew the hole closed by weaving the yarn in and out of the outer loops of the last round. Pull tight and knot securely.
Finishing Touches: Hide any loose ends by weaving them into the body of the bumblebee.
Congratulations! You've completed your crochet amigurumi bumblebee. Enjoy your new crafty friend or gift it to someone special to spread some cheerful vibes.


Leave a Reply