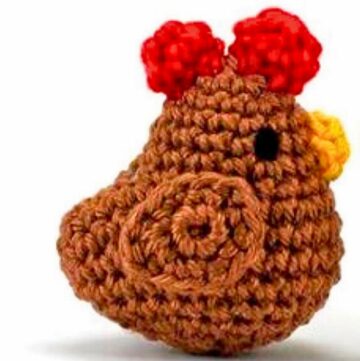
Enjoy making a delightful Crochet Amigurumi Duck Keychain. Perfect for any skill level; add this adorable accessory to your keys or bags!
Crochet Amigurumi Duck Keychain Pattern
Ever dreamed of carrying a pocket-sized piece of handmade joy with you? Meet the Crochet Amigurumi Duck Keychain Pattern! This adorable project is perfect for all skill levels, featuring a cuddly, round-shaped duck complete with a cute beak and tiny wings. Not only is it fun to create with its bright and simple stitches, but it also makes a charming accessory for your keys, bags, or as a heartfelt gift. Its small, portable size means you can take a touch of handcrafted happiness wherever you go. Happy crocheting!

Why Love This Pattern?
- Beginner-Friendly: The pattern is designed to be extremely easy and accessible, making it perfect for beginners who are new to crochet.
- Step-by-Step Instructions: The tutorial provides clear, detailed instructions with each step broken down, including how many stitches to make and where to place them.
- Cute Design: The finished product is a cute duck wearing a hat, which can be a delightful project to make for gifts or personal use.
- Variety of Techniques: The pattern introduces various techniques such as creating a magic ring, single crochet, increases, and decreases, allowing you to practice and improve your crochet skills.
- Versatility: You can customize the duck with different colors and add personal touches, making it your own unique creation.

How To Crochet Amigurumi Duck Keychain
Materials Needed:
- Yarn (various colors)
- Crochet hook (suitable for your yarn)
- Yarn needle for sewing
- Stuffing material
Head
- Row 1:
- Make a magic ring.

- Crochet 8 single crochets (sc) into the magic ring.
- Pull the yarn tightly and create a slip stitch (sl st) into the first stitch.
- Make a magic ring.
- Row 2:
- Chain 1 (ch 1).
- Make an increase in all stitches (8 times) by crocheting 2 single crochets in each stitch.
- Slip stitch into the first stitch.
- Row 3:
- Chain 1.
- Make 1 single crochet in the first stitch and then 1 increase in the next stitch.
- Repeat this pattern (1 sc, 1 inc) 7 more times.
- Slip stitch into the first stitch.
- Row 4:
- Chain 1.
- Make 1 single crochet in each stitch around (total of 24 single crochets).
- Slip stitch into the first stitch.
- Rows 5 to 6:
- Repeat Row 4.
- Row 7:
- Chain 1.
- Make 6 single crochets.
- In the next 4 stitches, make 1 increase in each.
- Make 4 single crochets.
- Make 4 increases.
- Make 6 single crochets.
- Slip stitch into the first stitch.

- Row 8:
- Chain 1.
- Make 1 single crochet in the first 6 stitches.
- Make 1 single crochet in the next stitch, then 1 increase in the next stitch.
- Repeat the pattern (1 sc, 1 inc) 3 more times.
- Make 4 single crochets.
- Make 1 single crochet, then 1 increase (repeat 3 more times).
- Make 1 single crochet into the next 6 stitches.
- Slip stitch into the first stitch.
- Row 9:
- Chain 1.
- Make 6 single crochets.
- Make 1 single crochet into the next 2 stitches.
- Make a decrease (insert hook, pull up a loop, insert hook into next stitch, pull up a loop, yarn over, pull through all loops on hook).
- Repeat the pattern (1 sc, 1 dec) 3 more times.
- Make 4 single crochets.
- Make 1 decrease.
- Make 1 single crochet, then 1 decrease (repeat 3 more times).
- Make 1 single crochet in the next 6 stitches.
- Slip stitch into the first stitch.
- Row 10:
- Chain 1.
- Make 6 single crochets.
- Make 4 decreases.
- Make 4 single crochets.
- Make 4 decreases.
- Make 1 single crochet in the next 6 stitches.
- Slip stitch into the first stitch.
- Row 11:
- Chain 1.
- Make 1 single crochet.
- Using the next 2 stitches, make 1 decrease.
- Repeat this pattern 7 more times.
- Begin stuffing after this row.
- Row 12:
- Chain 1.
- Make 8 decreases.
- Slip stitch into the first stitch.
- Fasten off.

Body
- Row 1:
- Chain 1.
- Work into the front loops only and make 8 single crochets.
- Slip stitch into the first stitch.
- Row 2:
- Chain 1.
- Make 8 increases.
- Slip stitch into the first stitch.
- Row 3:
- Chain 1.
- Make 1 single crochet in the first stitch, then 1 increase.
- Repeat this pattern 7 more times.
- Slip stitch into the first stitch.
- Rows 4 to 5:
- Chain 1.
- Make 24 single crochets.
- Slip stitch into the first stitch.
- Change color of yarn
- Row 6:
- Chain 1.
- Make 24 single crochets.
- Slip stitch into the first stitch.
- Row 7:
- Chain 1.
- Make 9 single crochets.
- Make 6 single crochets into the back loops only.
- Make 9 single crochets.
- Slip stitch into the first stitch.
- Row 8:
- Chain 1.
- Make 1 single crochet.
- Using the next 2 stitches, make 1 decrease.
- Repeat this pattern 7 more times.
- Row 9:
- Chain 1.
- Make 8 decreases.
- Begin stuffing.
- Fasten off and leave a long tail for sewing.
Arms and Legs
- Arms:
- Follow similar patterns as above with adjustments to size.
- Legs:
- Make a magic ring.
- Crochet 6 single crochets.
Overalls
- Insert your hook and grab the yarn, leaving about 30 cm tail.
- Chain 1.
- Make 6 single crochets using the front loops only.
- Make 2 chains and turn.
- Make 6 half-double crochets.
- Make 12 chains.
- Cut the yarn leaving another 30 cm tail.
Mouth
- Insert your hook between row 8 and row 9 of the head.
- Grab your yarn and make 4 slip stitches.
- Chain 1 and turn.
- Make 3 single crochets.
- Slip stitch and fasten off.

Hat
- Row 1:
- Make a magic ring and crochet 8 single crochets into it.
- Row 2:
- Chain 1 and make 8 increases.
- Row 3:
- Chain 1.
- Make 1 single crochet in the first stitch, then 1 increase.
- Repeat this pattern 7 more times.
- Rows 4 to 5:
- Chain 1.
- Make 24 single crochets.
- Row 6:
- Chain 1.
- Make 9 slip stitches.
- Make 2 chains.
- Make 1 half double crochet.
- Make 1 double crochet.
- Make 2 double crochets in the next stitch.
- Repeat the double crochet pattern once more.
- Make 1 double crochet, 1 half double crochet.
- Make 2 chains and 1 slip stitch.
- Make 9 slip stitches.
- Slip stitch into the first stitch and fasten off.
Assembly
- Sew all parts together.
- Add any eyes or extra features as desired.
Your cute, crocheted duck is now complete!


Leave a Reply