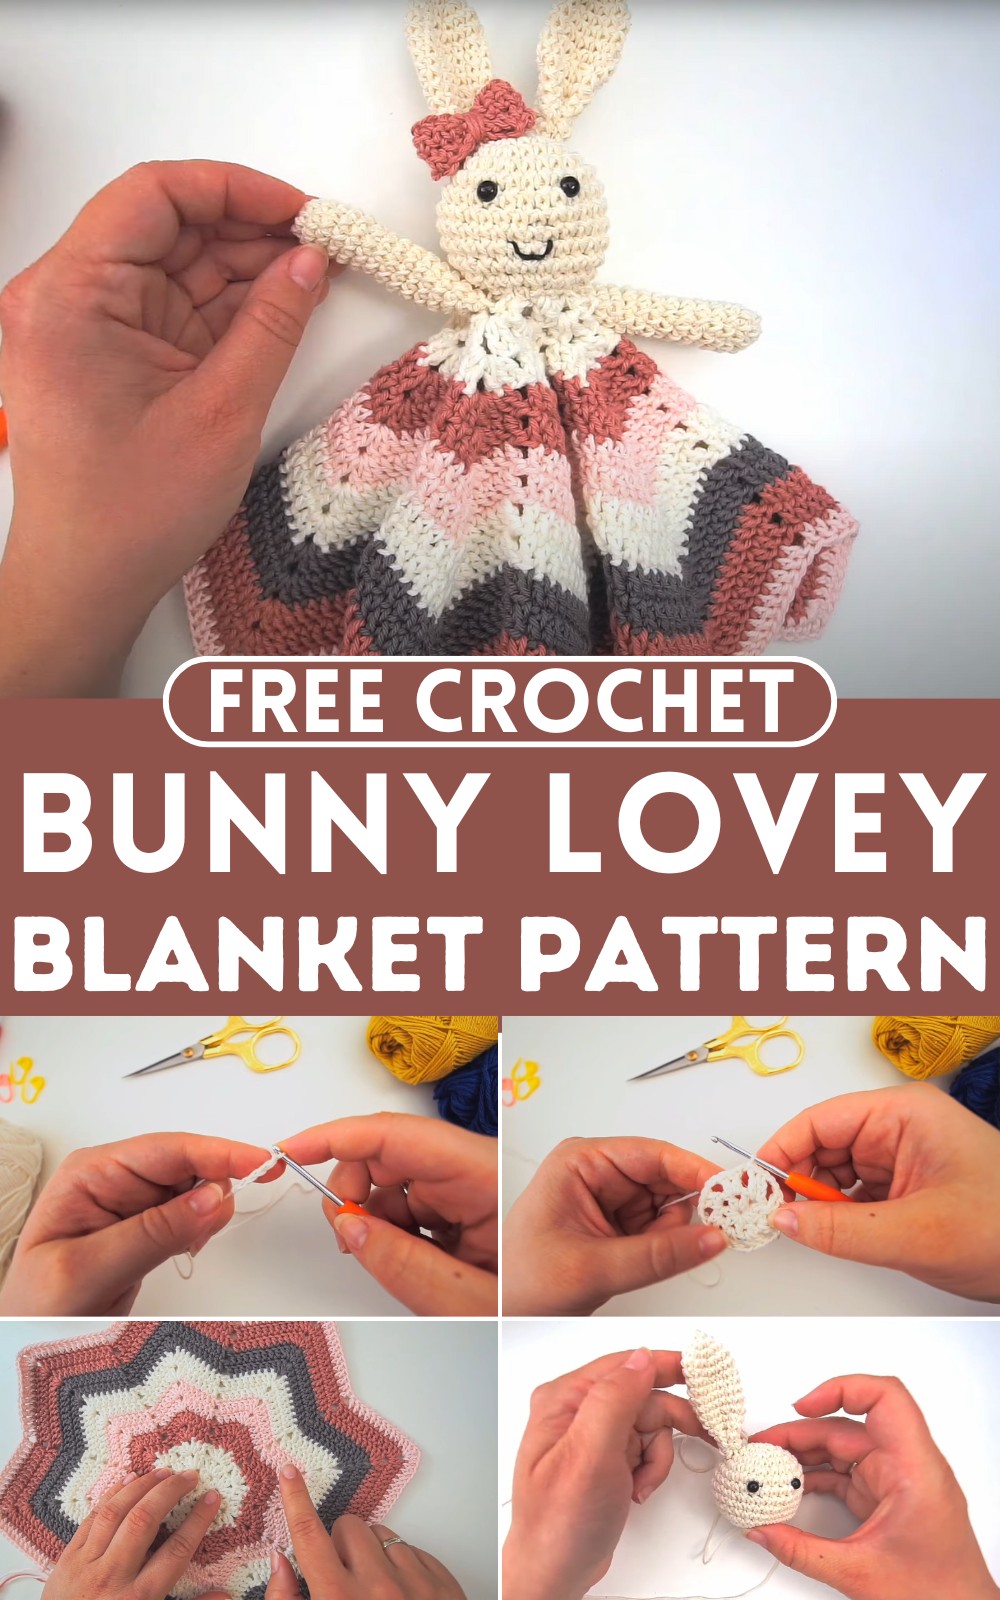
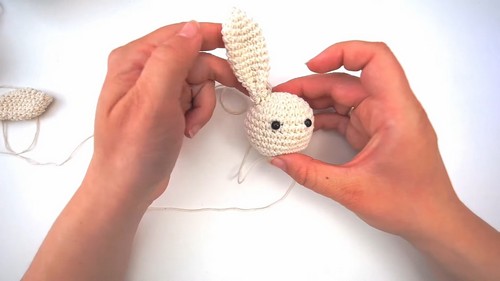
The Crochet Bunny Lovey Blanket is a handmade comfort item for babies with a soft bunny head and cozy blanket. Perfect for cuddles and security!
Crochet Bunny Lovey Blanket Pattern
A sweet mix of a plush toy and a cozy blanket! The Crochet Bunny Lovey Blanket is the perfect comfort item for little ones. With its soft, huggable bunny head, floppy ears, and a gentle-textured blanket, it offers warmth and security. The pattern is easy to follow, making it a great handmade gift for babies and toddlers. The bunny’s cute face adds extra charm, while the lightweight design makes it perfect for cuddles anytime. The bunny lovey brings joy and comfort in the most adorable way!
Why Love This Pattern?
- Easy to Follow: The pattern is straightforward and broken down into clear, manageable steps, making it accessible even for beginners.
- Detailed Instructions: The creator provides detailed instructions for every part of the bunny lovey, ensuring that you won't miss any crucial steps.
- Customizable Colors: You can personalize the bunny lovey by choosing your own color combinations for the yarn.
- Simple Materials: The pattern uses basic crochet tools and materials, most of which crochet enthusiasts likely already have.
- Adorable Result: The final product is a cute and cuddly bunny lovey, perfect as a gift for a baby or toddler.
- Versatile Design: The lovey can be made in different sizes and colors, making it a versatile project.
![]()
How To Crochet Bunny Lovey Blanket
Materials:
- 3 mm crochet hook
- Tapestry needle
- Scissors
- 2 safety eyes
- 100% cotton yarn in size 8/4 in various colors
Abbreviations:
- Sl st: Slip stitch
- Ch: Chain
- Dc: Double crochet
- Sc: Single crochet
- Inc: Increase (2 sc in the same stitch)
- Dec: Decrease (2 sc together)
Pattern:
Body:
- Round 1:
- Make a slip knot and chain 4.
- Join ends with a slip stitch to form a ring.
- Chain 4 (counts as 1 dc and 1 ch).
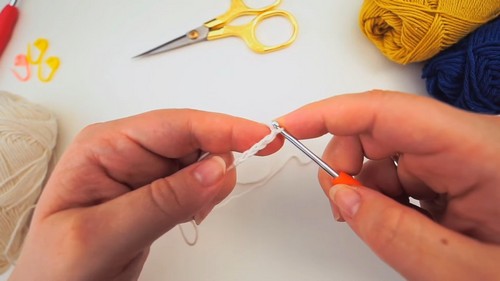
- Dc in the ring, ch 1.
- Repeat 7 more times for a total of 8 dc with chain spaces in between.
- Join with a slip stitch in the 3rd chain of the beginning chain 4.
- Round 2:
- Slip stitch into the first chain gap.
- Ch 3 (counts as 1 dc).
- Dc in the same gap, ch 2, 2 dc in the next gap, ch 2.
- Continue this pattern around.
- Join with a slip stitch in the 3rd chain of the beginning chain 3.
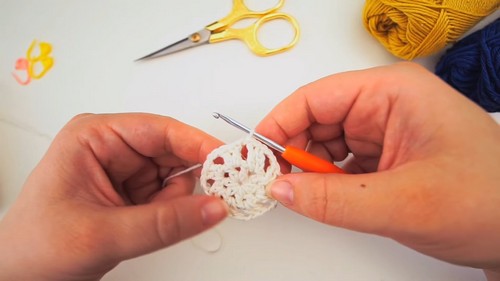
- Round 3:
- Slip stitch into the first chain gap.
- Ch 3, dc in the same gap, ch 2, 2 dc in the same gap.
- In the next gap, 2 dc, ch 2, 2 dc.
- Continue this pattern around.
- Join with a slip stitch.
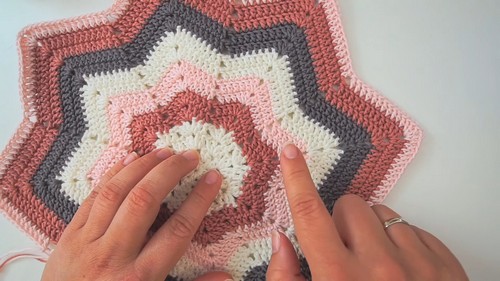
- Round 4:
- Slip stitch into the first chain gap.
- Ch 3, dc in the same gap, ch 2, 2 dc in the same gap.
- Dc in each stitch on the sides, skip 2 stitches near the bottom, and then dc again.
- Continue increasing in the same pattern around.
- Join with a slip stitch.
- Rounds 5 and onward:
- Continue increasing with one additional dc per round between the gaps until you reach the desired size.
- Change colors as desired before joining the ends with a slip stitch.
Head:
- Round 1:
- Make a magic ring with 6 sc.
- Pull tight to close the ring.
- Join with a slip stitch in the first sc.
- Round 2:
- Inc in each st around (12 sc).
- Round 3:
- Sc, inc in the next st.
- Repeat around (18 sc).
- Round 4:
- Sc in each of the next 2 sts, inc in the next.
- Repeat around (24 sc).
- Round 5:
- Sc in each of the next 3 sts, inc in the next.
- Repeat around (30 sc).
- Rounds 6-11:
- Sc in each st around (30 sc).
- Round 12:
- Sc in each of the next 3 sts, dec in the next.
- Repeat around (24 sc).
- Insert safety eyes between rounds 6 and 7, spaced evenly apart.
- Round 13:
- Sc in each of the next 2 sts, dec.
- Repeat around (18 sc).
- Round 14:
- Sc, dec.
- Repeat around (12 sc).
- Stuff the head.
- Round 15:
- Dec in each st around (6 sc).
Ears (make 2):
- Round 1:
- Make a magic ring with 5 sc.
- Pull tight to close the ring.
- Round 2:
- Sc in each st around.
- Inc in the next stitch and continue around (increase every alternate stitch until you have 13 sts).
- Rounds 3-10:
- Sc in each st around until you have 10 rounds.
- Round 11:
- Sc two together on either side, ending up with nine stitches.
- Round 12-15:
- Continue sc in each st around until tall enough, fasten off.
Arms (make 2):
- Round 1:
- Make a magic ring with 6 sc.
- Pull tight to close the ring.
- Round 2:
- Inc in each st around (12 sc).
- Rounds 3-14:
- Sc in each st around (continues with decreases until correct length).
Assembly:
- Ears:
- Flatten the top of the ears and sew them to the side of the head, making sure they are symmetrical.
- Arms:
- Sew the arms close to the neck area on either side.
- Head:
- Attach the head to the center of the body securely by sewing around the base.
- Embroider a small nose and mouth on the head.
Optional: Attach a small bow or accessory to one of the ears for added detail.
![]()
Finalizing:
- Weave in all loose ends and ensure all parts are securely attached.
- Your crochet bunny lovey is now complete!
Hope you found this detailed pattern helpful!


Leave a Reply