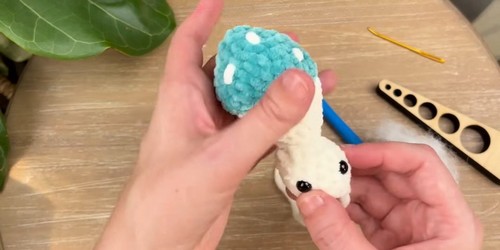
Creating a crochet mushroom amigurumi is a fun and creative way to spend your time. You start by choosing colorful yarns to bring the little mushroom to life. With a crochet hook in hand, you carefully follow a pattern, making loops and stitches that slowly form the shape of a mushroom. It's like magic how yarn turns into a cute, soft toy!
Crochet Amigurumi Mushroom Pattern
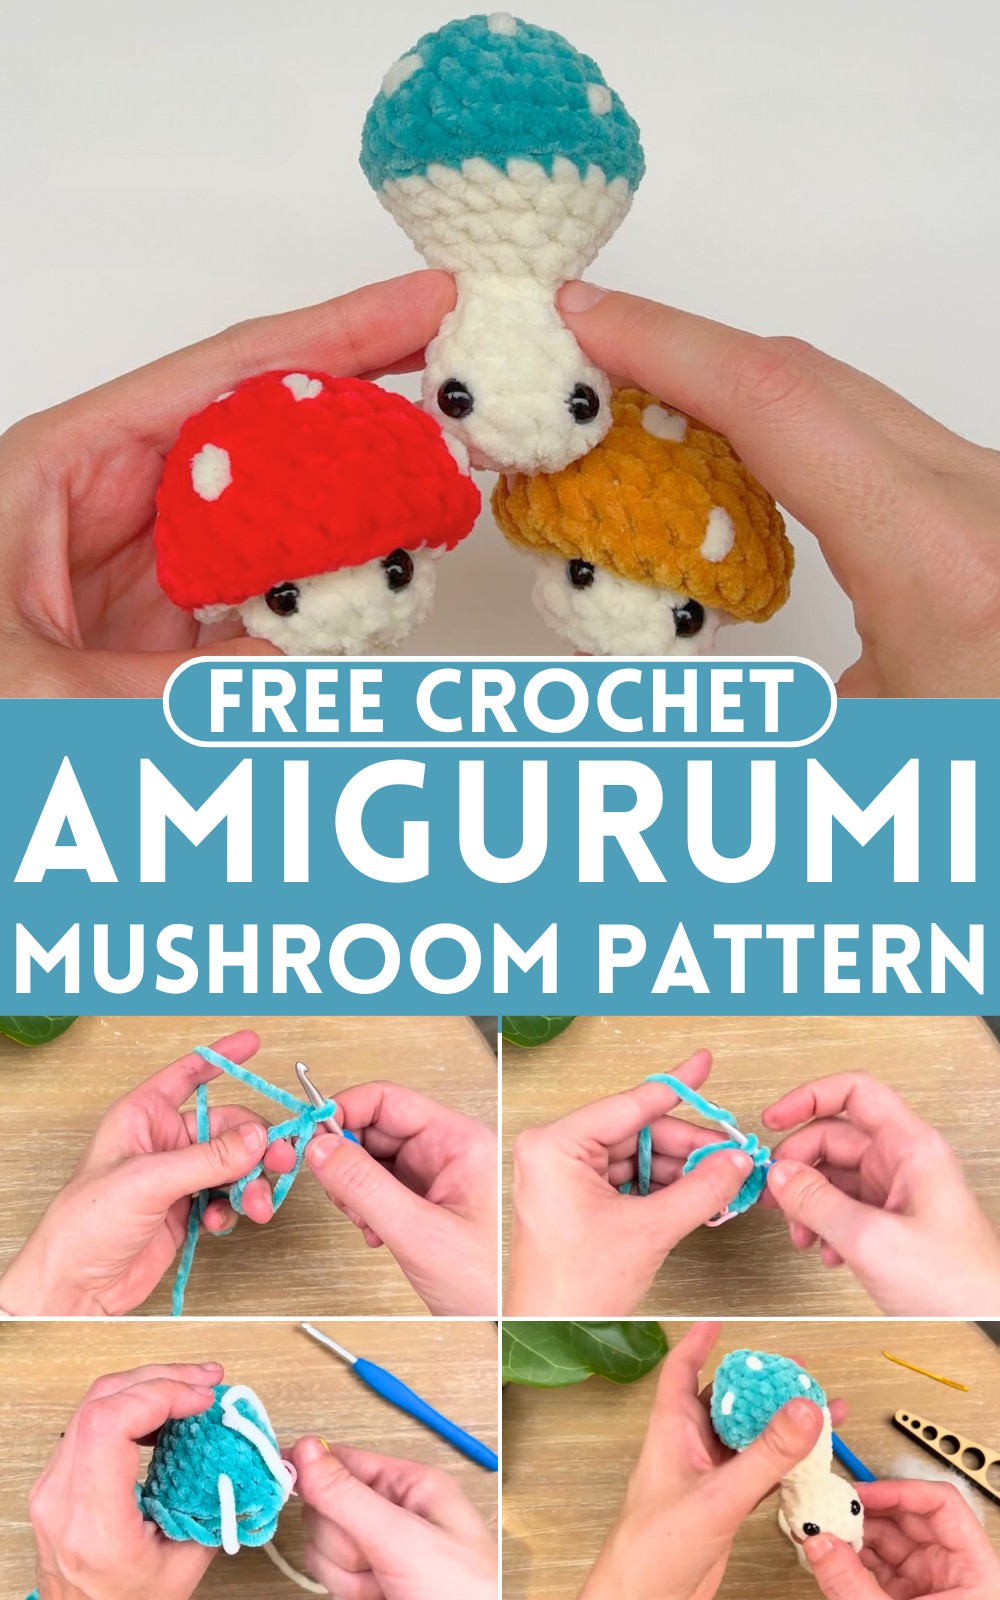
Adding little eyes gives it a personality, making it even more adorable. Whether for yourself or as a gift, this crochet mushroom is sure to bring smiles and a touch of whimsy to anyone who sees it.
Materials
- Medium-weight yarn (body color)
- Medium-weight yarn (cap color)
- Medium-weight yarn (spots color, optional)
- Crochet hook (Size 4 or 5)
- Scissors
- Tapestry needle
- Stuffing (polyester fiberfill)
- Safety eyes (optional)
- Keychain (optional)
Starting Your Project
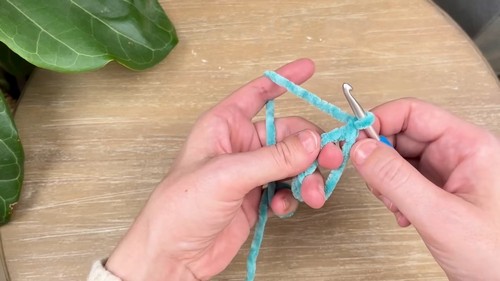
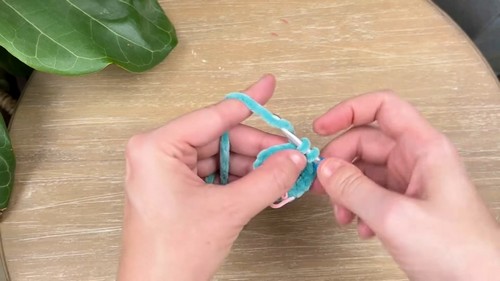
Magic Circle
- Creating the Circle: Wrap the yarn around your two fingers to form an X. Pull the top yarn through to create a loop.
- Begin Stitching: Chain one, then make six single crochets in the magic circle.
- Close the Circle: Tighten the circle to secure the six single crochets.
Pattern Rounds
Round 1: Starting Off
- Increase: Make two single crochets in each stitch around to end with 12 single crochets.
Round 2: Expanding
- Single crochet in the first stitch.
- Increase: In the next stitch, make an increase.
- Repeat the above steps until you reach 18 single crochets.
For Round 3: Consistency
- Single crochet in each stitch around to maintain 18 single crochets.
Round 4: Continued Growth
- Single crochet in the first stitch.
- Increase: Two single crochets in the next stitch.
- Repeat this pattern around to end with 24 single crochets.
Rounds 5 and 6: Stability
- Single crochet in each stitch around, keeping a total of 24 single crochets in each round.
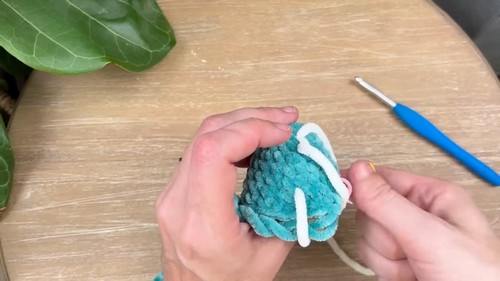
Round 7: Color Transition
Yarn Change: Switch to cream-colored yarn.
- Begin with a single crochet in the first back loop.
Decrease: Combine two back loops into one.
- Repeat steps 2 and 3 until the final stitch, then single crochet in the last back loop to have 18 single crochets.
Round 8: Maintaining Shape
- Single crochet in each stitch around, totaling 18 single crochets.
Rounds 9 to 11: Decreasing
- Gradually decrease stitches as instructed to eventually have 6 single crochets left.
Rounds 12 to 16: Final Rounds
- Incrementally increase and then maintain stitch counts as detailed, concluding with a round of decreases.
Finishing Touches
Stuffing and Closing
- Add safety eyes preferably before fully stuffing the head.
- Begin stuffing the head lightly before closing.
- Use a darning needle with the long tail to sew the open area shut.
- Finish stuffing the head to ensure it's well-shaped and firm.
- Perform a “pop” test to ensure proper shape and firmness.
Final Steps
- Secure all yarn ends by weaving them in.
- Trim away any excess yarn.
- Conduct a final “pop” test for quality assurance.
- Optionally, attach a keychain or desired accessory to your creation.
Enjoy your handcrafted crochet amigurumi, a perfect addition to any collection or as a heartfelt gift!


Leave a Reply